Do you have a monitor which isn't VESA compatible, but want to mount on a monitor stand?
This guide is designed to show you how to use a non VESA monitor mount so you can use a monitor stand and revolutionise your setup.
But before I go on, let me preface this article by saying that it's always better to have a VESA-compatible monitor to go alongside your monitor mounts because of things like:
If you would rather buy a VESA-compatible monitor, then this article won't be for you. Feel free to check out our best dual monitor stands if you're looking to get multiple monitors.
Having a VESA compatible monitor is just super easy to use and is native to the monitor mount stand.
In that case, I would recommend buying a new monitor, as it's a great investment for the long term.
In this guide, I will show you the cheaper alternative to buying a new monitor, and how you can save money doing so.
The method I'm about to show you works with any brand of monitor, and can fit monitor sizes ranging from 13" - 27", potentially pushing it to 30" - 32".
Before we start, here are some tools you're going to need:
Installation is very straight forward. In most cases, you should be able to follow the user manuals provided with the products.
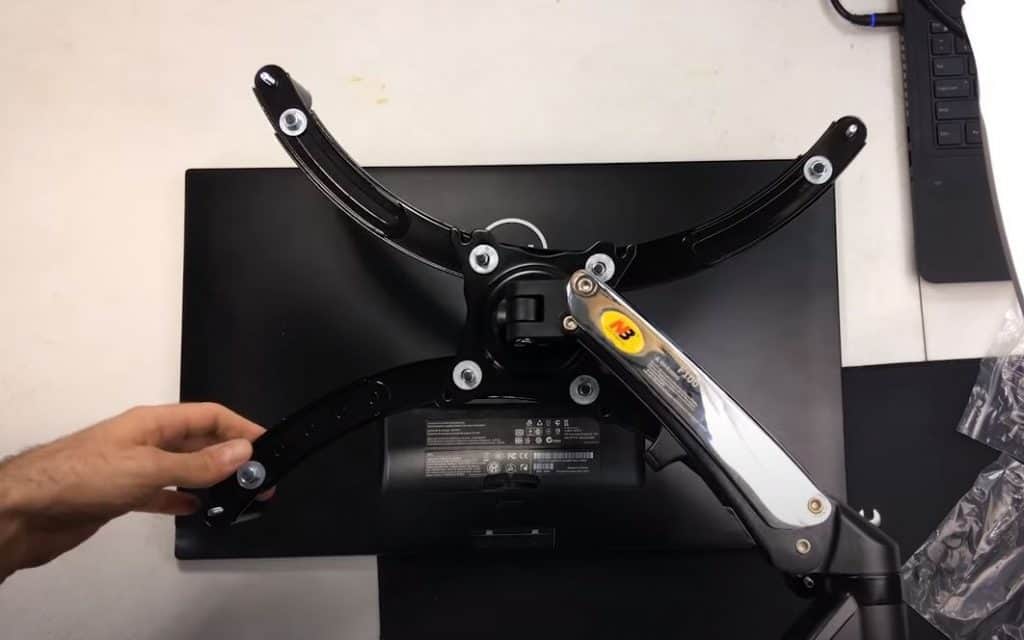
You first need to build up the mount bracket.
All VESA mount brackets are built differently, so ensure that you follow the instructions that it comes with, and don't miss a step...
You want to ensure that everything is tight and will hold your monitor right.
Once built, you should be able to screw it into your mount like so:

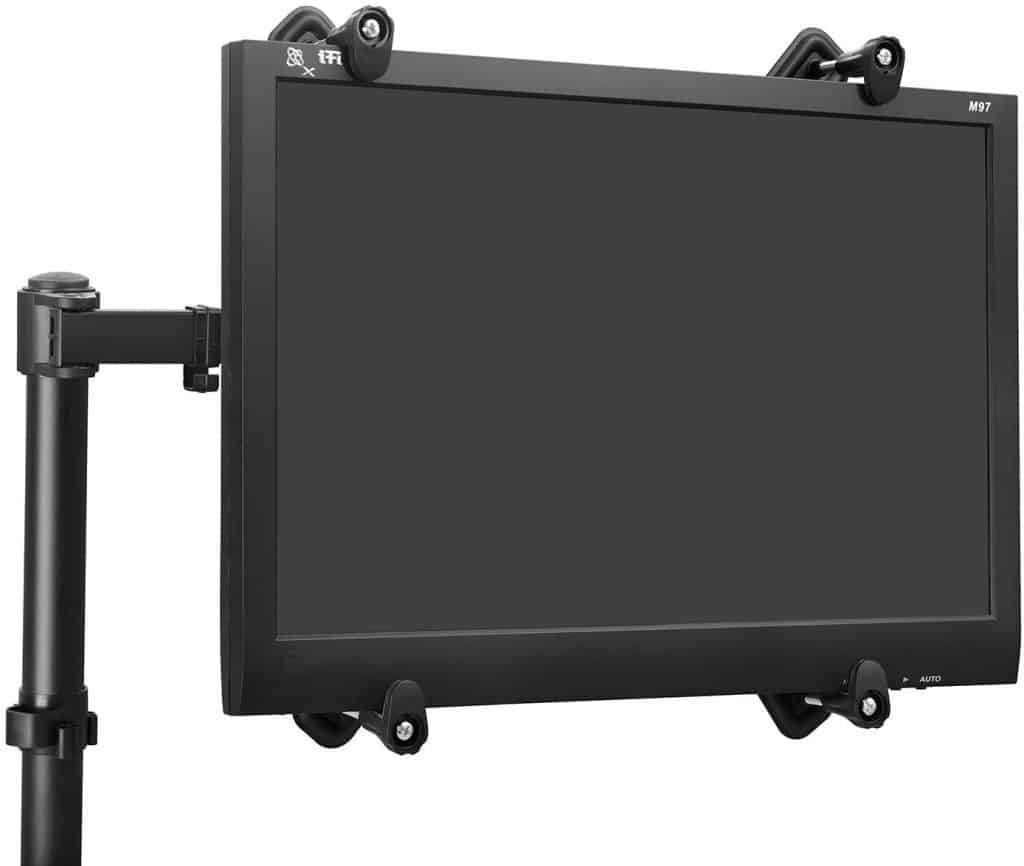
Then you can slide in the monitor into your brackets with ease.
Part of the reason why getting a monitor mount or stand is recommended is ergonomical benefits it provides.
Being able to set up your battlestation or workspace in a way that is healthy for your posture will prevent injuries in the future.
Below is a quick video on desk space ergonomics, feel free to watch the whole thing, but I've set it specifically to start at the monitor height section:
Before I was using a monitor mount, I used University textbooks and hardcover business books to raise the monitor height.
Using the non-VESA monitor method, you are able to adjust the height to the maximum range the product offers.
This will save your back and shoulders from bad posture which can cause long-term injuries.
Thanks to the innovation of these mounting brackets, any monitor can be mounted with ease by buying a few inexpensive tools.
But there are limitations when it comes to using this method:

If you're not 100% satisfied with using a mount bracket, you can do it the manual way and create the VESA holes yourself.
You can follow this video by Chasing Kings on how to do this.
This method would require manual tampering, a power drill, and common sense.
If you're not into drilling holes into your monitor, grabbing a mount bracket will be your best bet.
Mounting a non-VESA monitor to a monitor mount is definitely worth it, and can be a cost-effective alternative to buying a new monitor.
If you have a look at the price comparison:
| Mount Bracket | $18.99 |
| Monitor Mount | Varying From $39.99 - $99.99 Option 1 - VIVO Desk Mount Option 2 - North Bayou Desk Mount Option 3 - AmazonBasics Premium Desk Mount |
| Total (Budget Option) | $58.98 |
| Total (Most Expensive) | $118.98 |
| Estimated Time Spent Assembling | 20 - 60 mins |
VS.
| 20" - 27" Monitors | Varying From $74.99 - $250.00 - 20" Sceptre Frameless Monitor (VESA Compatible) - 27" ASUS 165Hz Gaming Monitor (VESA Compatible) |
| Monitor Mount | Varying From $39.99 - $99.99 Option 1 - VIVO Desk Mount Option 2 - North Bayou Desk Mount Option 3 - AmazonBasics Premium Desk Mount |
| Total (Budget Option) | $114.98 |
| Total (Most Expensive) | $349.99 |
| Estimated Time Spent Assembling | 5 - 30 mins |
As you can see, the budget options for buying the mount bracket vs. a 20" monitor (the recommended minimum size) is just above half of what you would've spent buying a new monitor.
Depending on your situation, and desk setup, see which option you would rather use, and decide accordingly.
Also see our list of the best cheap gaming desks if you want the perfect desk to suit your battlestation setup.
Happy mounting!